> ## Documentation Index
> Fetch the complete documentation index at: https://docs.apyguard.com/llms.txt
> Use this file to discover all available pages before exploring further.
# Security Scanning
# Your First API Security Scan
This guide will walk you through creating your first API collection and running a security scan with ApyGuard.
## Prerequisites
* An ApyGuard account (sign up at [apyguard.com](https://apyguard.com))
* An API specification file (OpenAPI 3.0, Swagger 2.0, or Postman collection)
* Basic understanding of your API endpoints
## Step 1: Create an API Collection
### Option A: Import from File
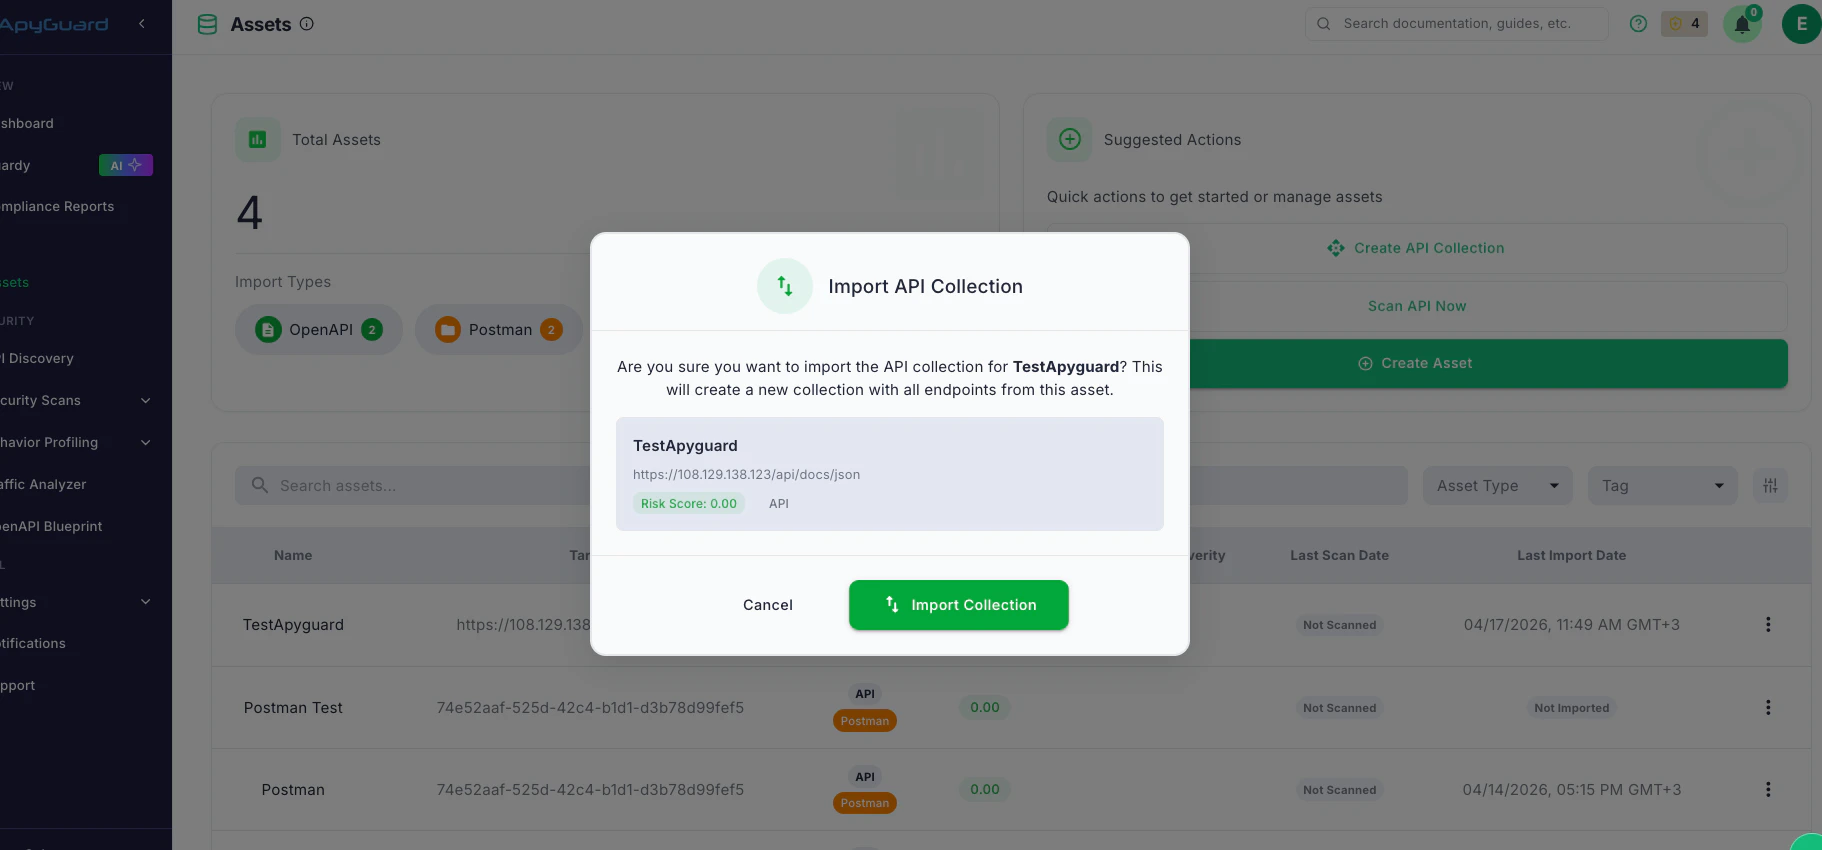
1. Navigate to **Assets** in your dashboard
2. Click **"Create API Collection"**
3. Choose **"Import API Collection"**
 ## Step 2: Configure Authentication
Before running scans, you need to set up authentication for your API:
### API Key Authentication
1. Go to your asset details → configure scan
2. Select **"Authorization"**
## Step 2: Configure Authentication
Before running scans, you need to set up authentication for your API:
### API Key Authentication
1. Go to your asset details → configure scan
2. Select **"Authorization"**
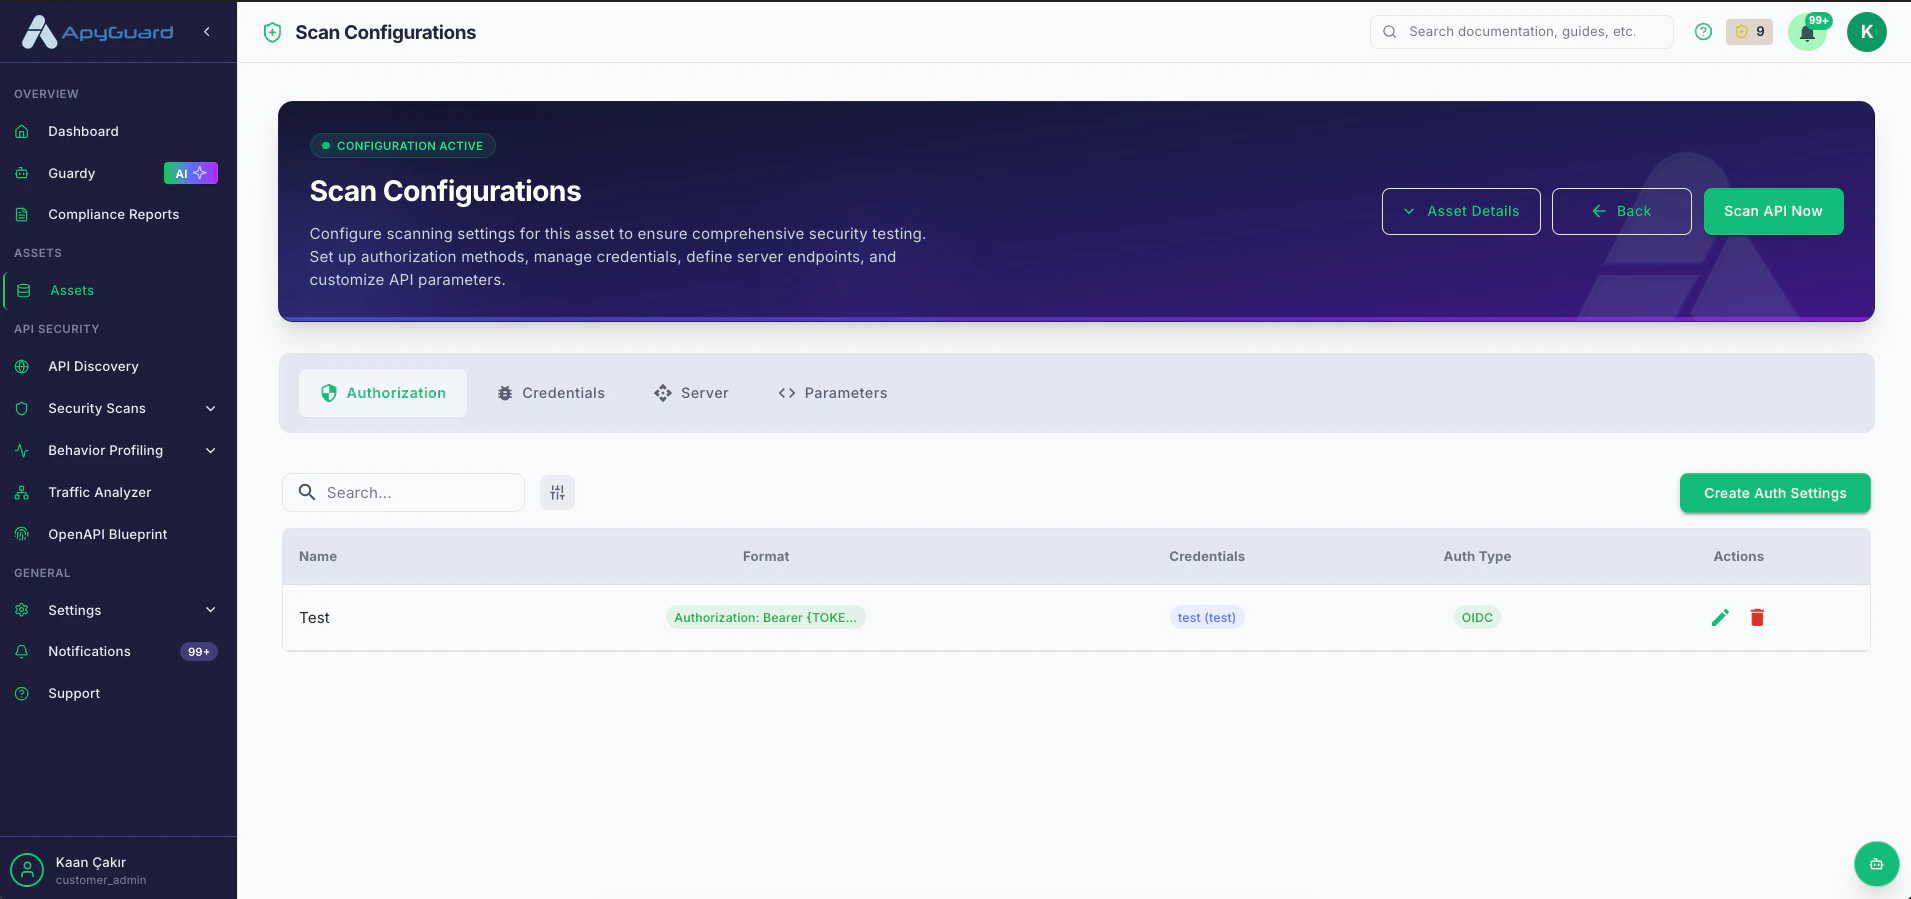 3. Choose **"Create Auth Settings"**
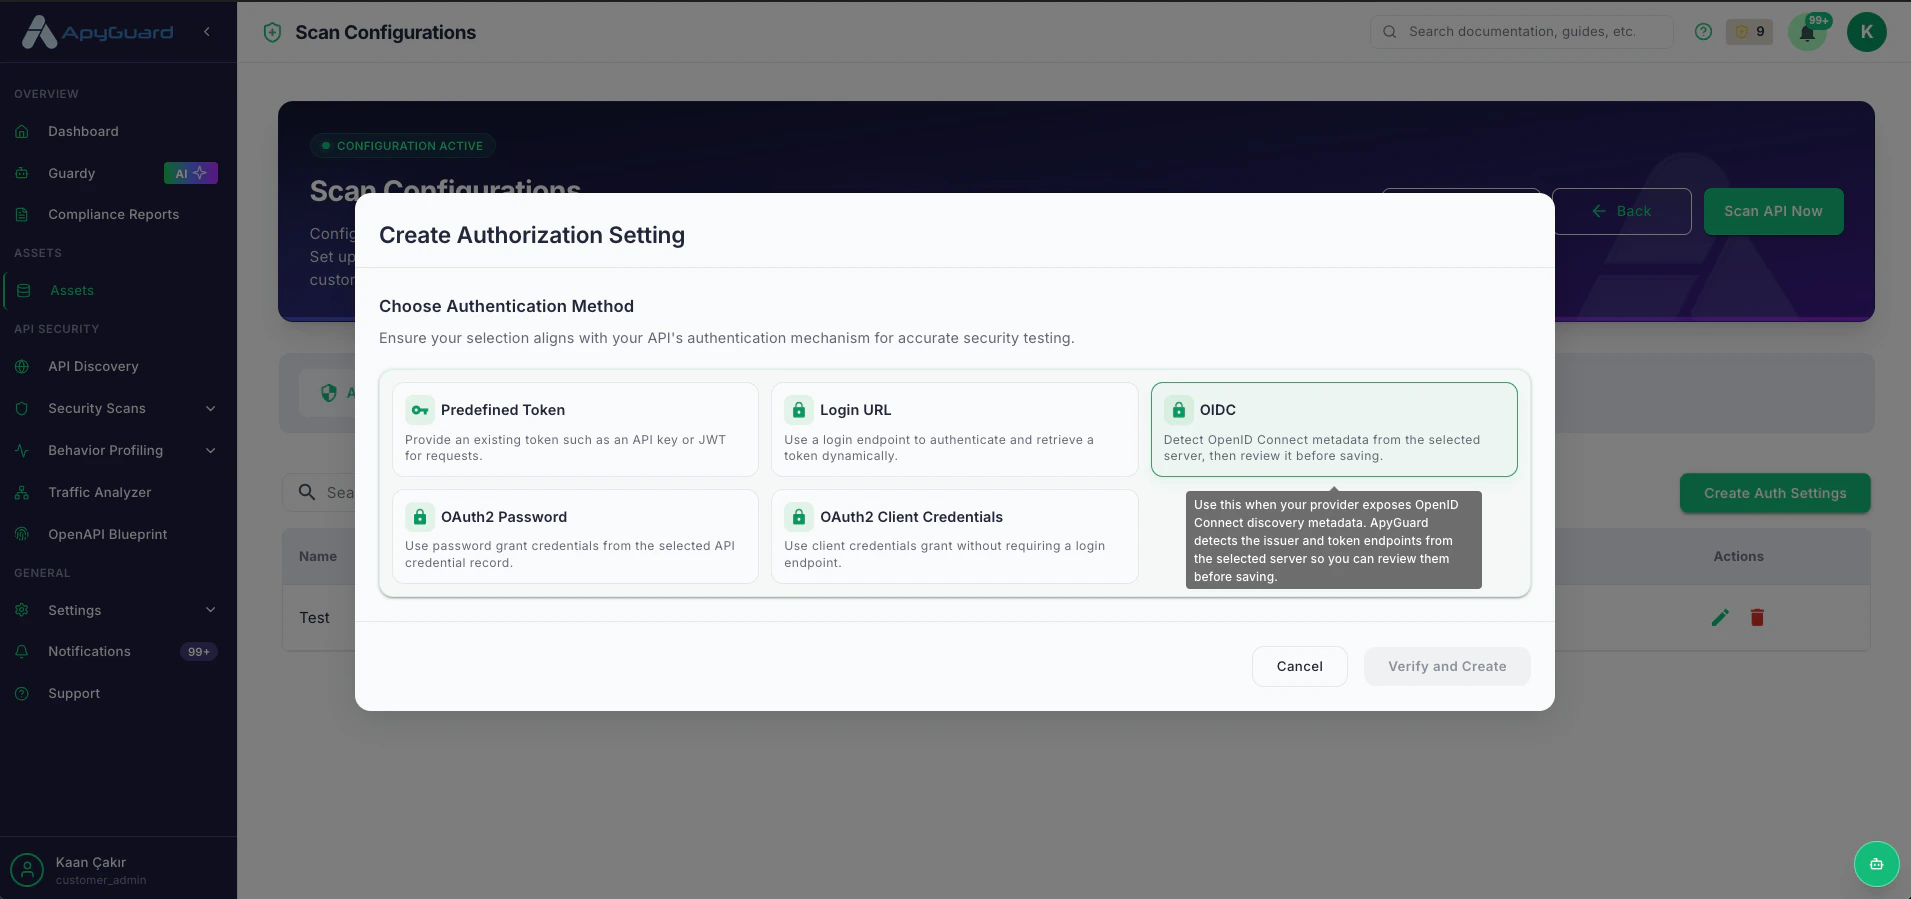
4. Choose your authentication method
3. Choose **"Create Auth Settings"**
4. Choose your authentication method
 ### Authorization Verify
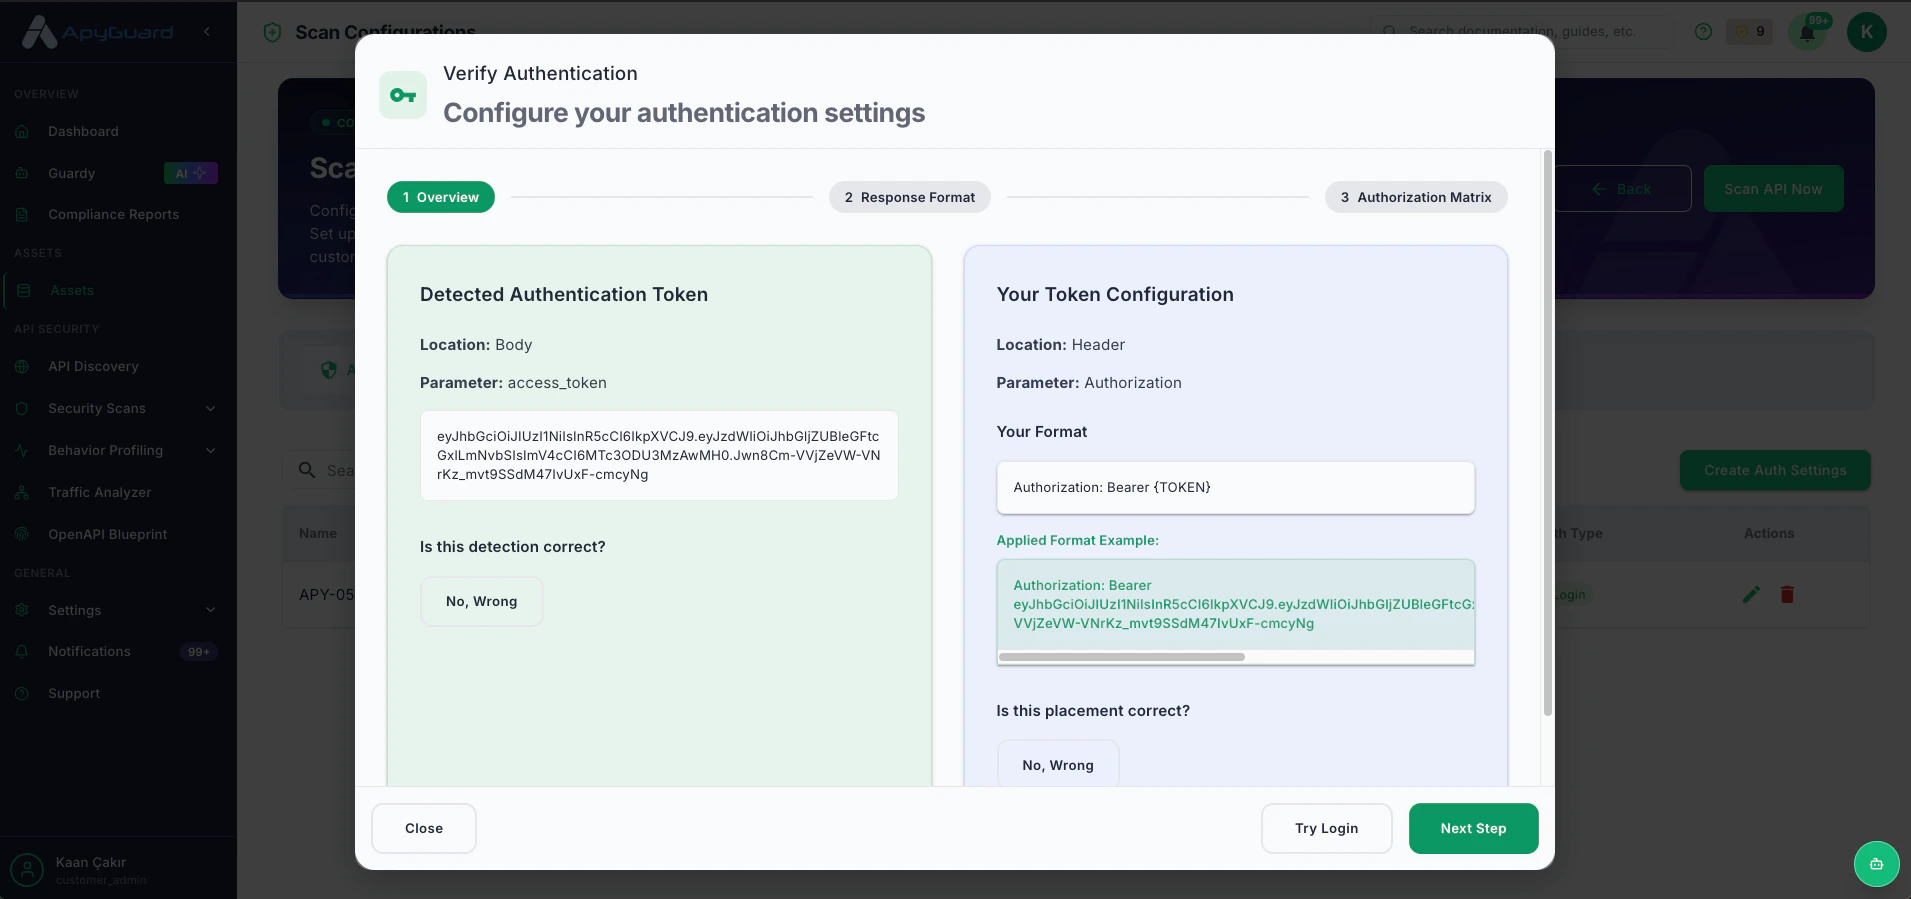
Before creating authorization settings you can verify your configuration with detected endpoints.
1. Press create button.
### Authorization Verify
Before creating authorization settings you can verify your configuration with detected endpoints.
1. Press create button.
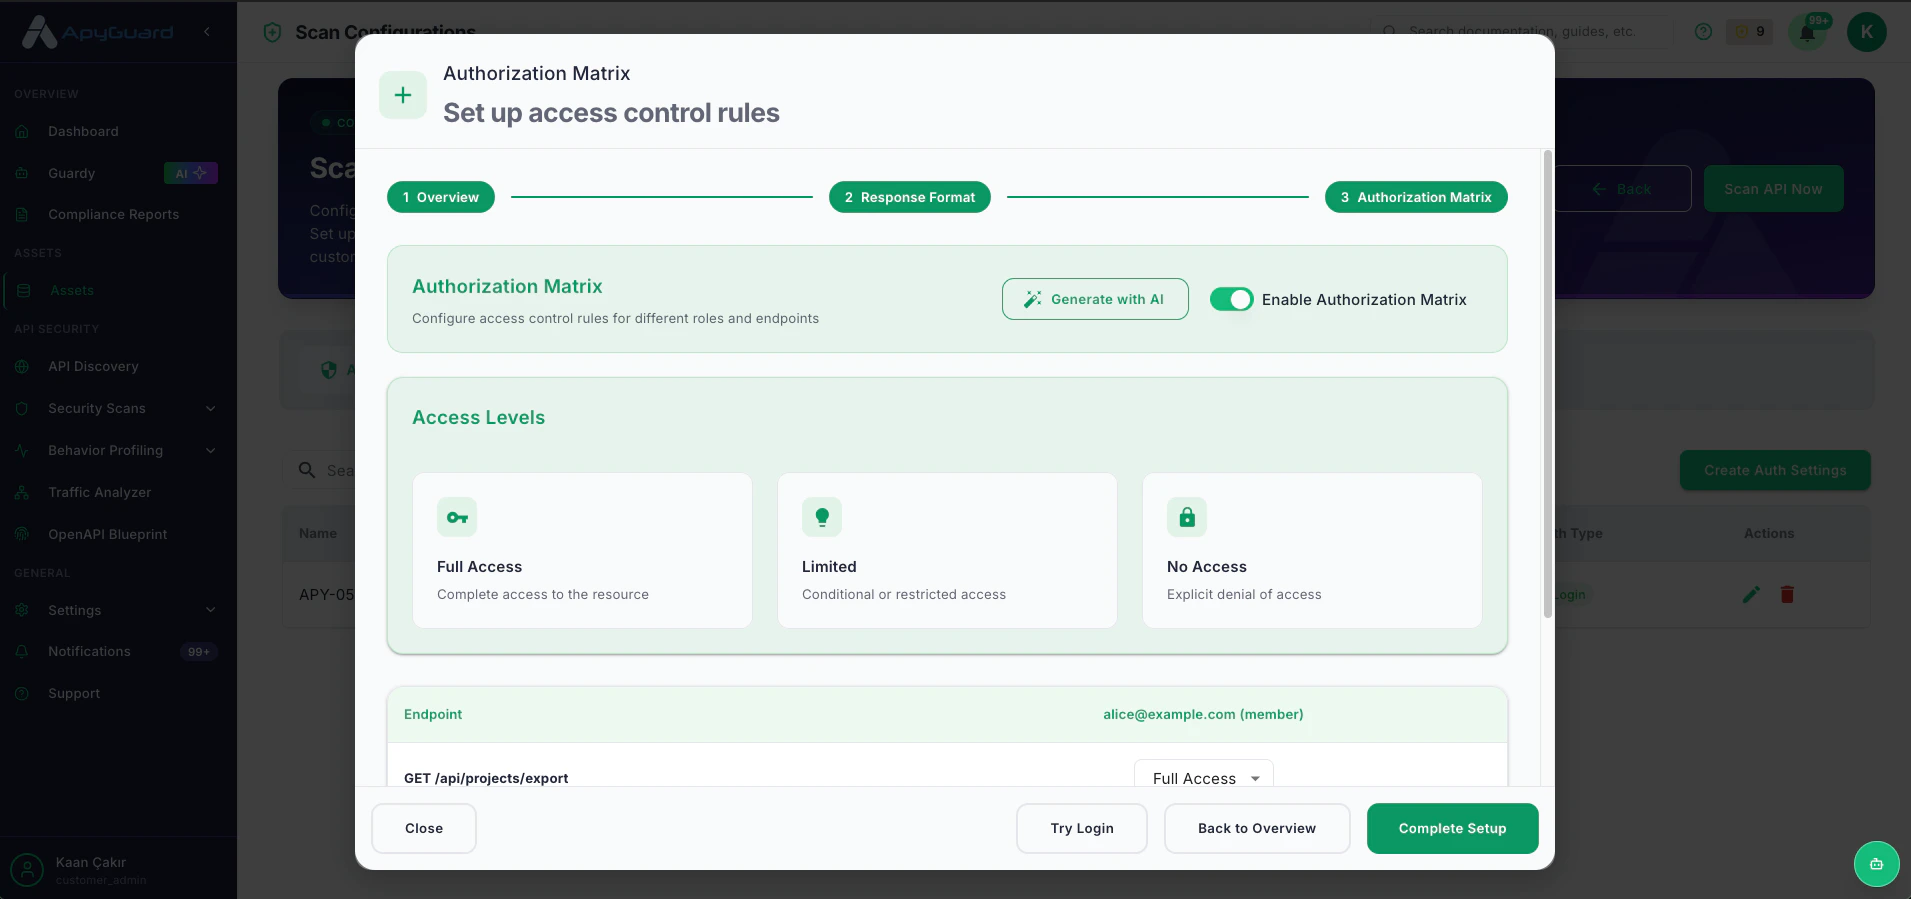
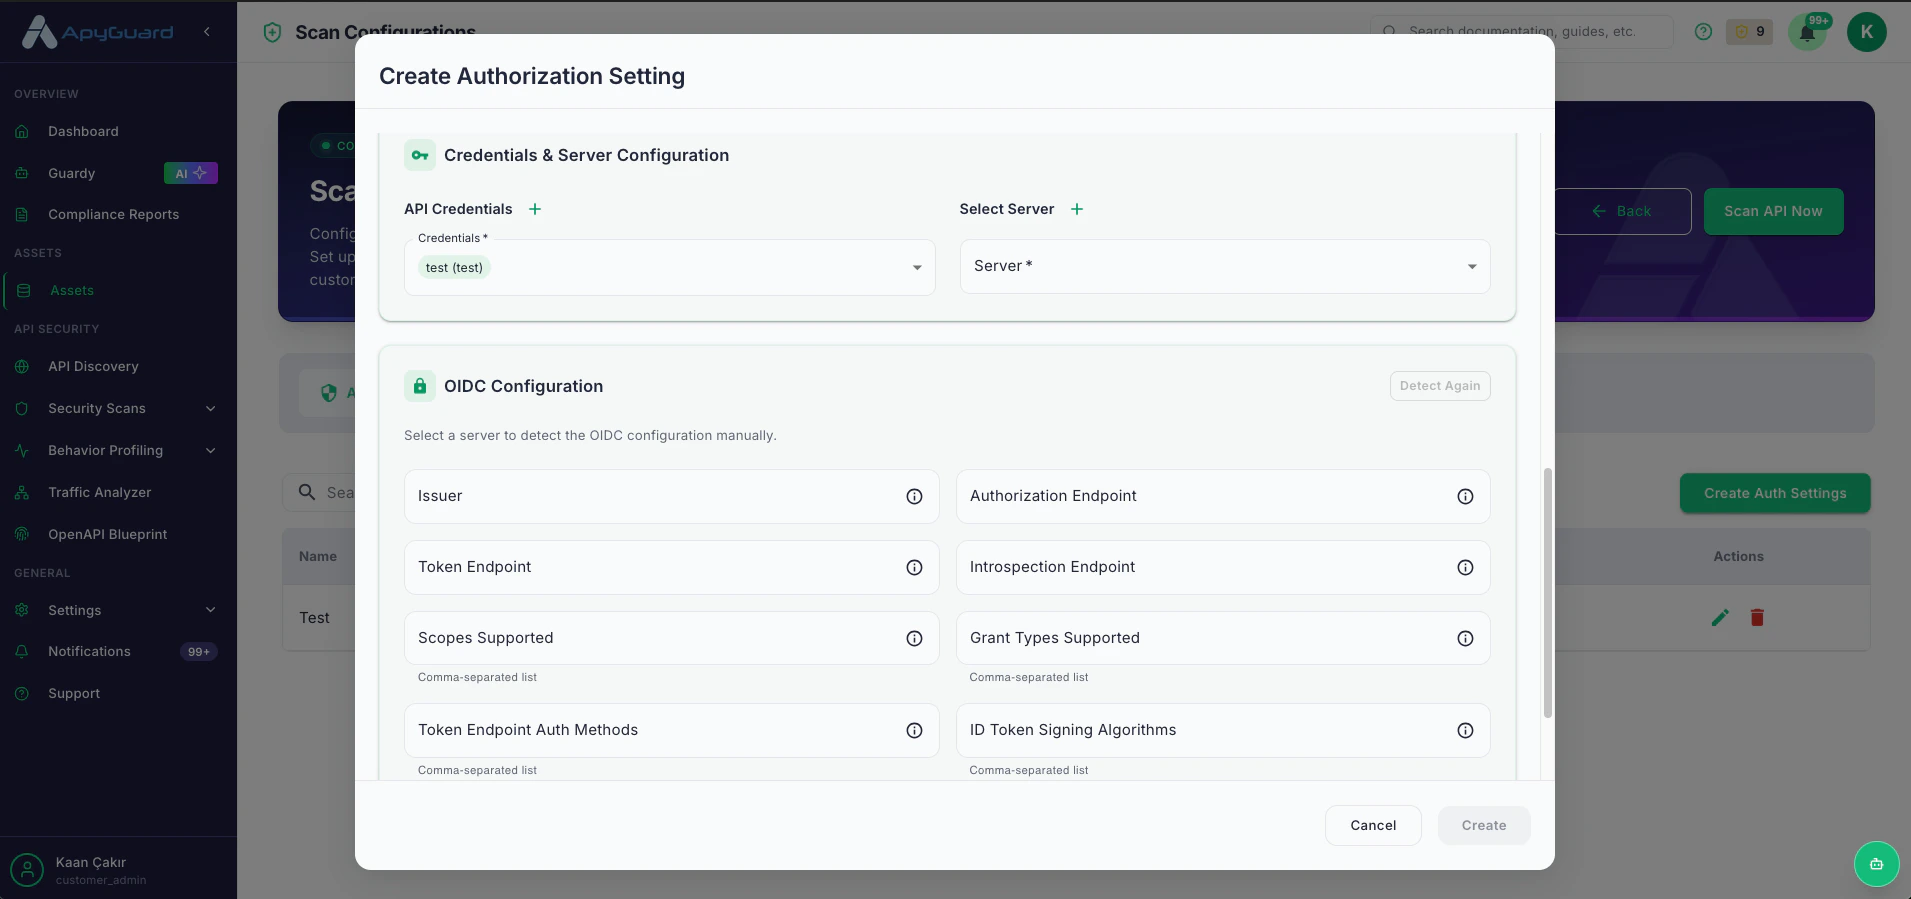 2. See the detected token and move to the auth matrix step.
 3. If needed change the token from the response body on editor.
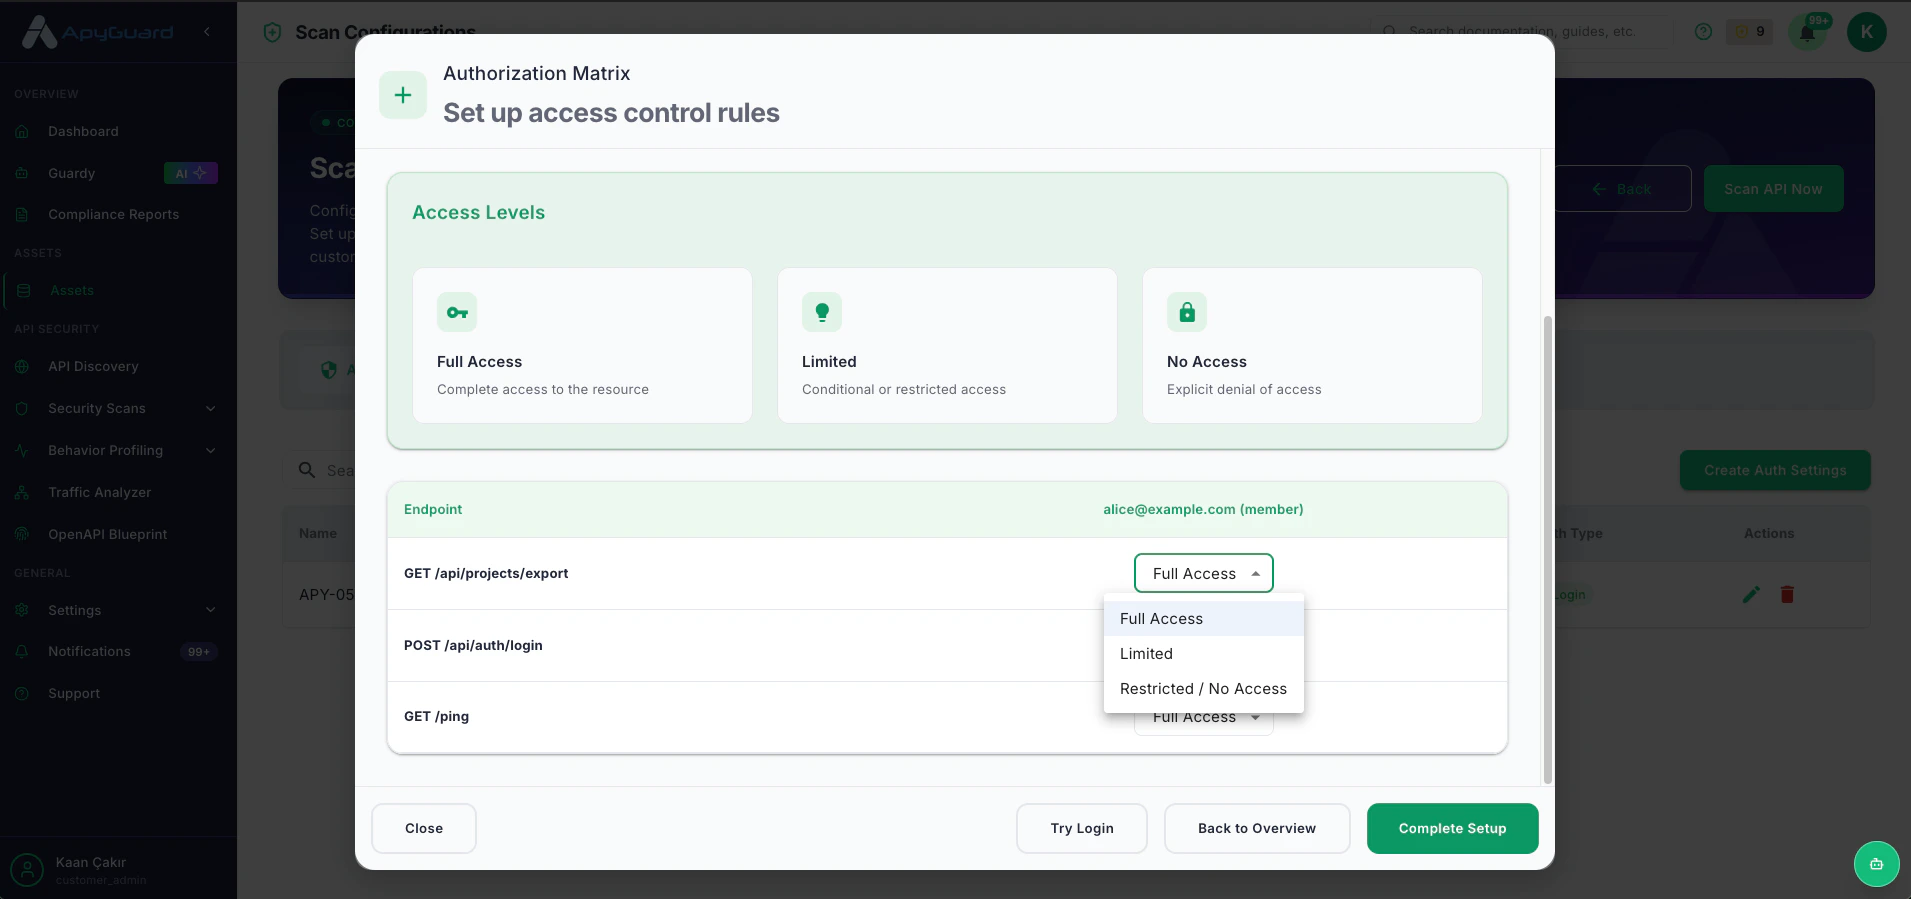
4. Create your authorization matrix.
3. If needed change the token from the response body on editor.
4. Create your authorization matrix.
 ## Step 3: Run Your First Scan
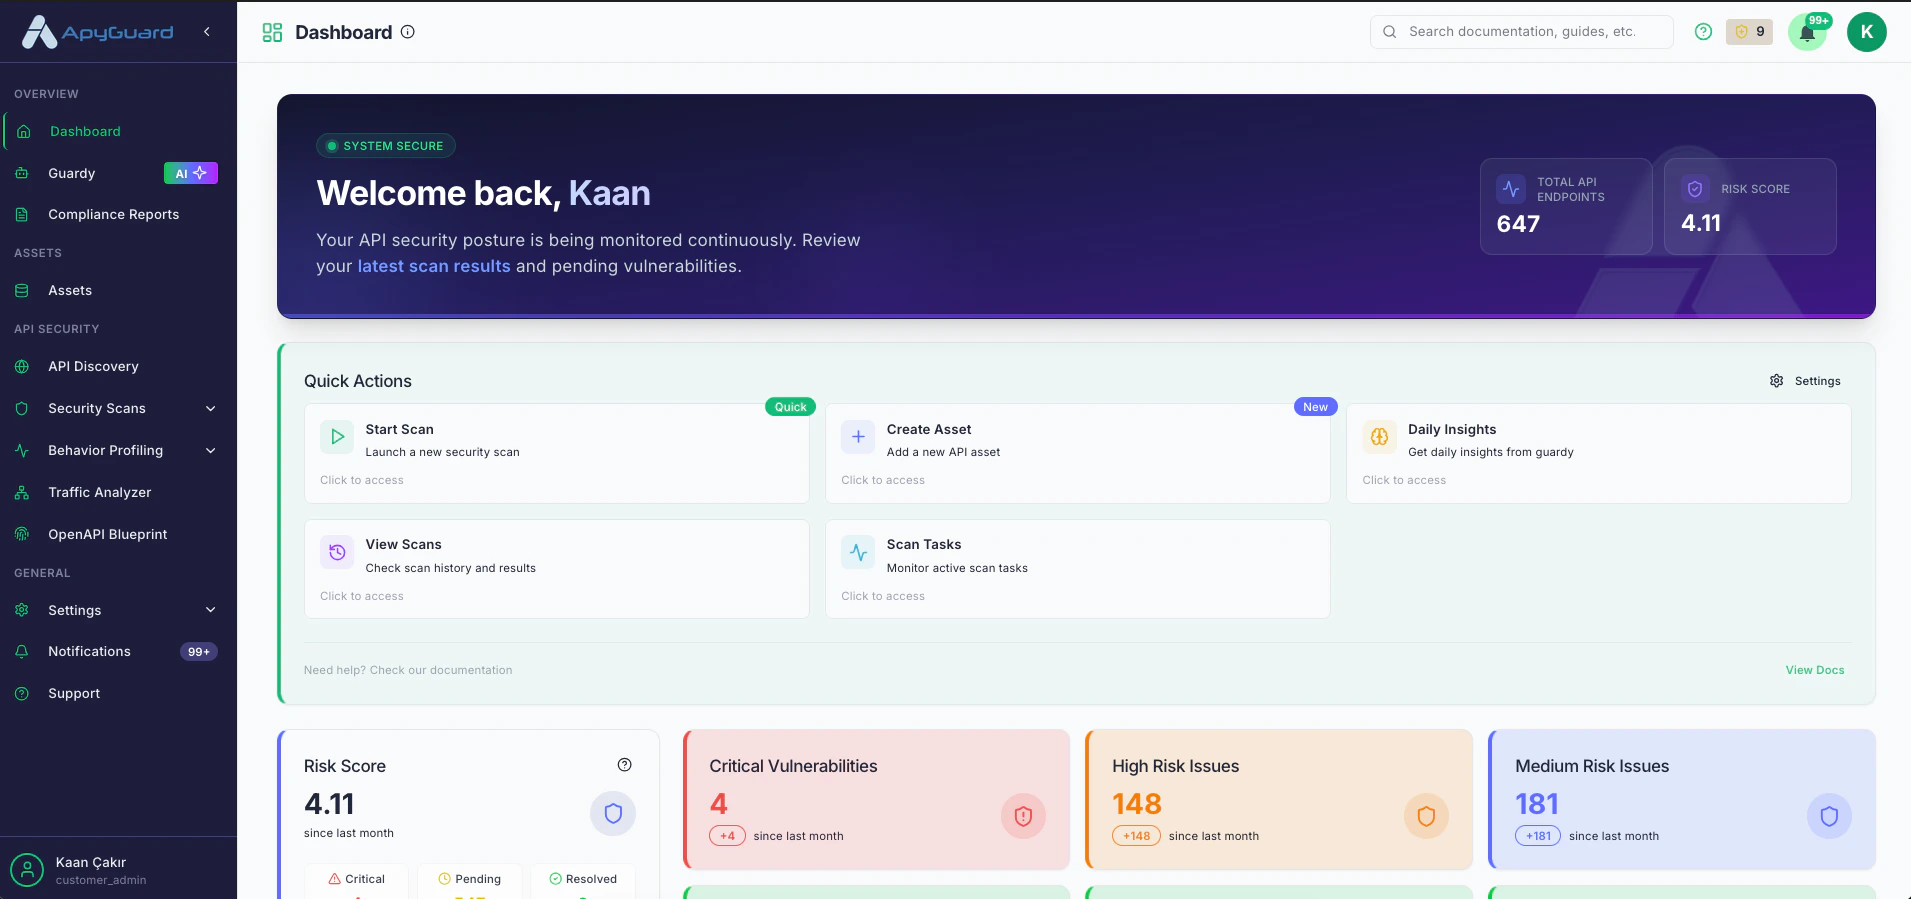
1. Navigate to **"Start Scan"** in your dashboard
## Step 3: Run Your First Scan
1. Navigate to **"Start Scan"** in your dashboard
 2. Select your Asset and API collection
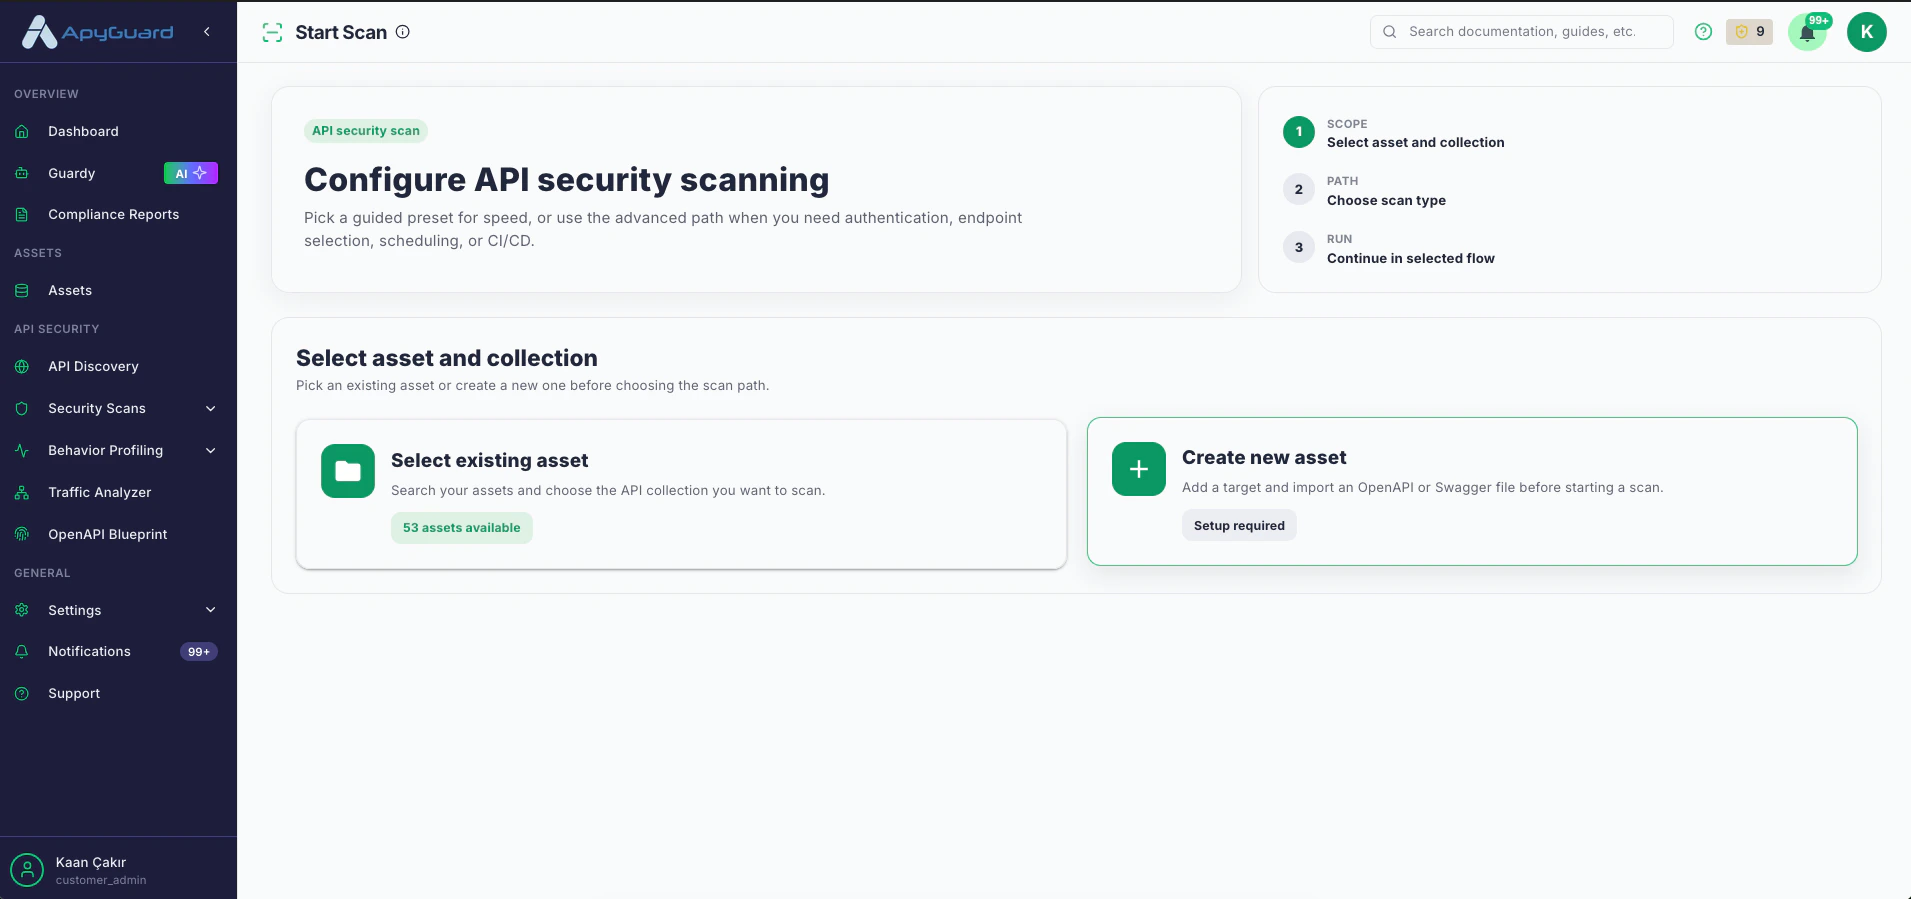 3. Choose endpoints to scan:
* **Easy Scan**: Scan selected endpoints with basic tests
* **Custom Scan**: Select specific endpoints and tests
3. Choose endpoints to scan:
* **Easy Scan**: Scan selected endpoints with basic tests
* **Custom Scan**: Select specific endpoints and tests
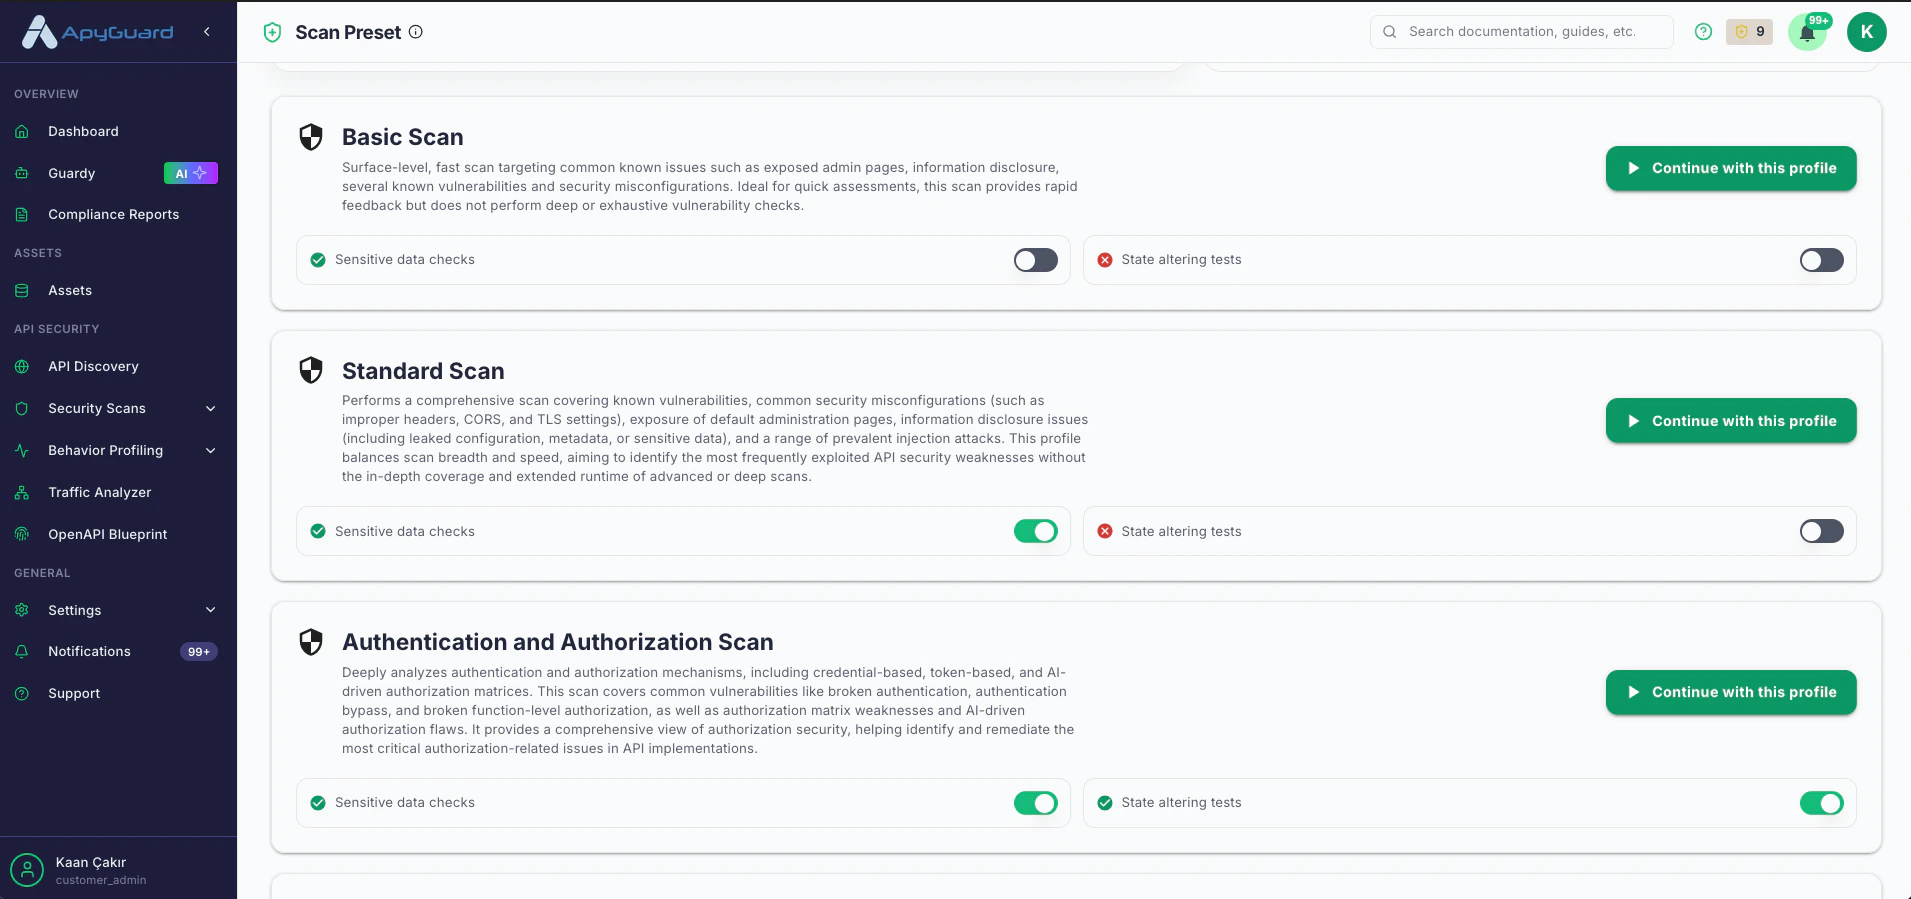
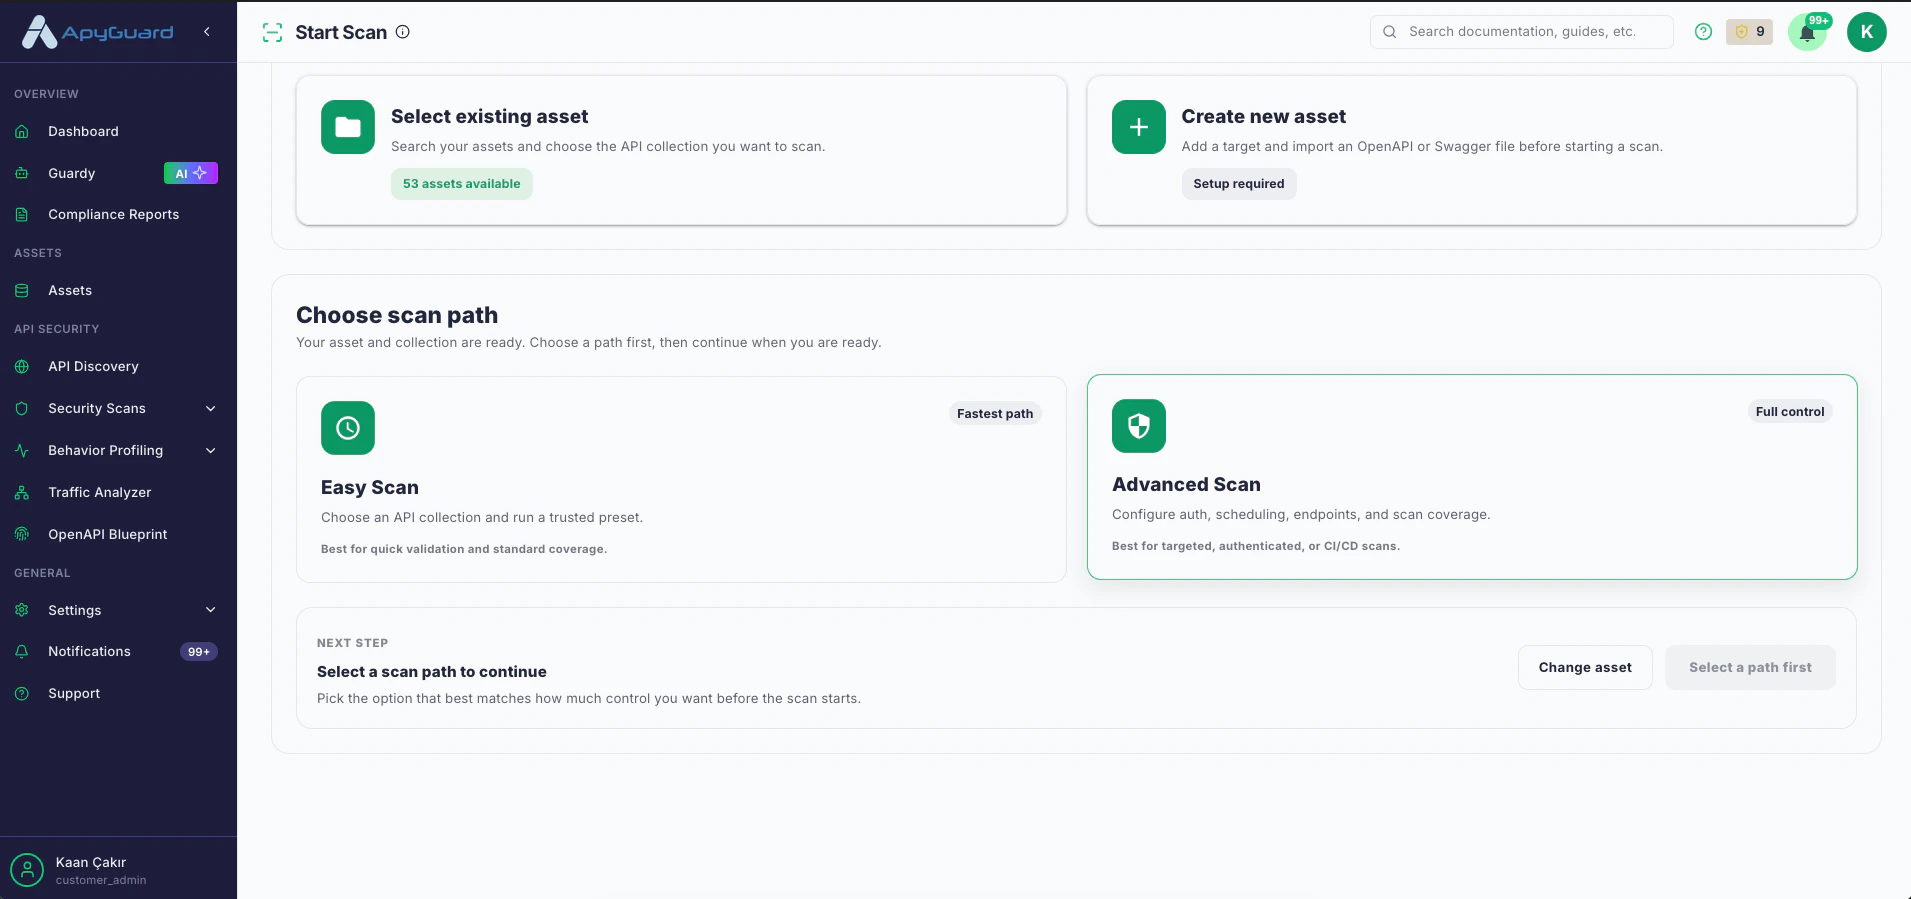 4. For easy scan select the scan type between choices that suits your needs.
 5. For advenced scan you need to choose your scan settings.
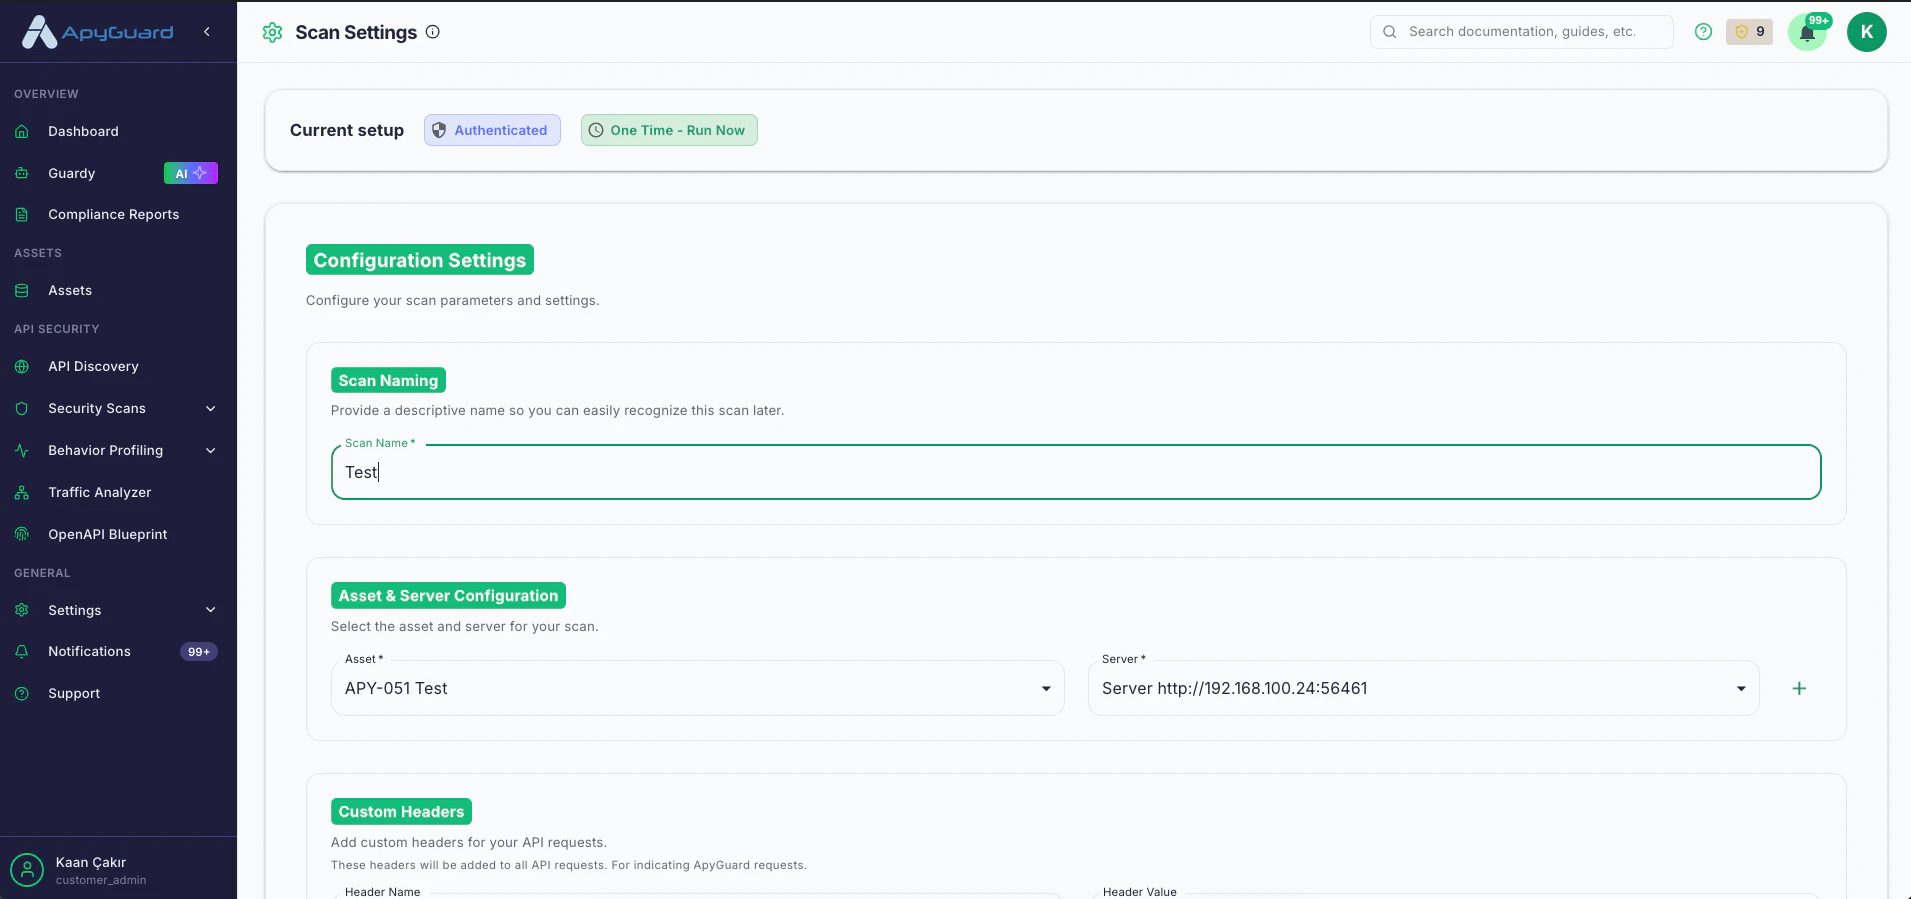
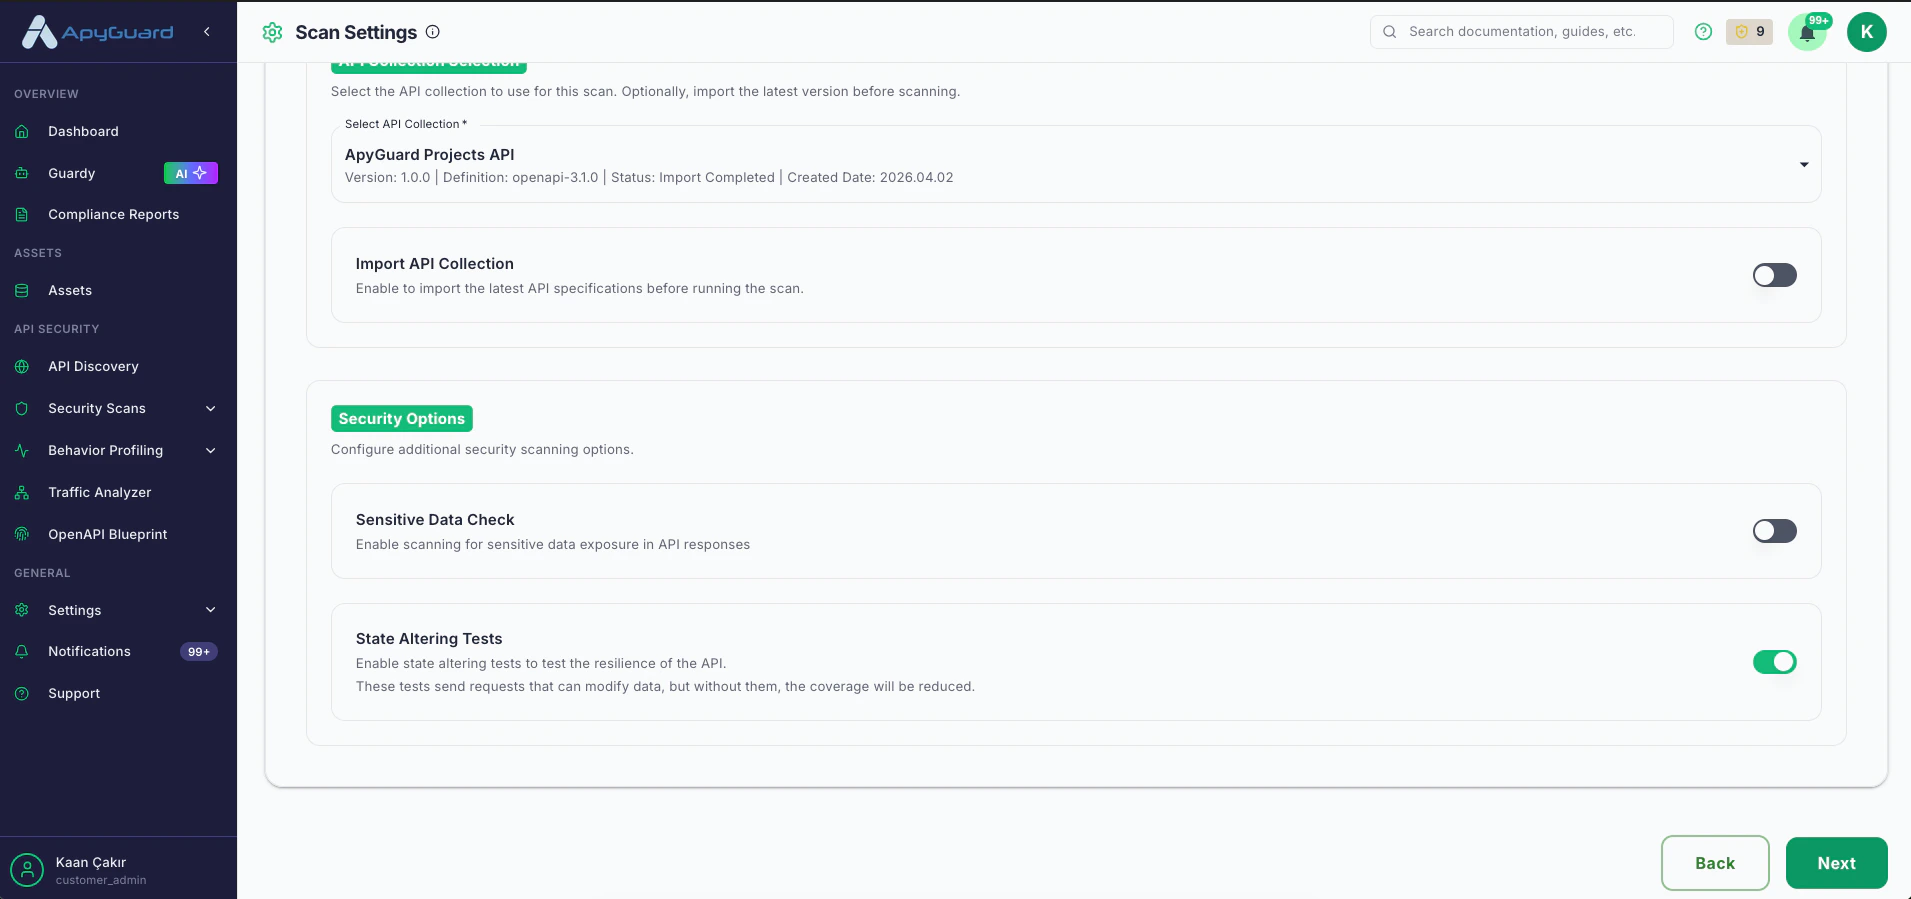 6. Select authorization setting to be used in this scan if scan type selected authenticated
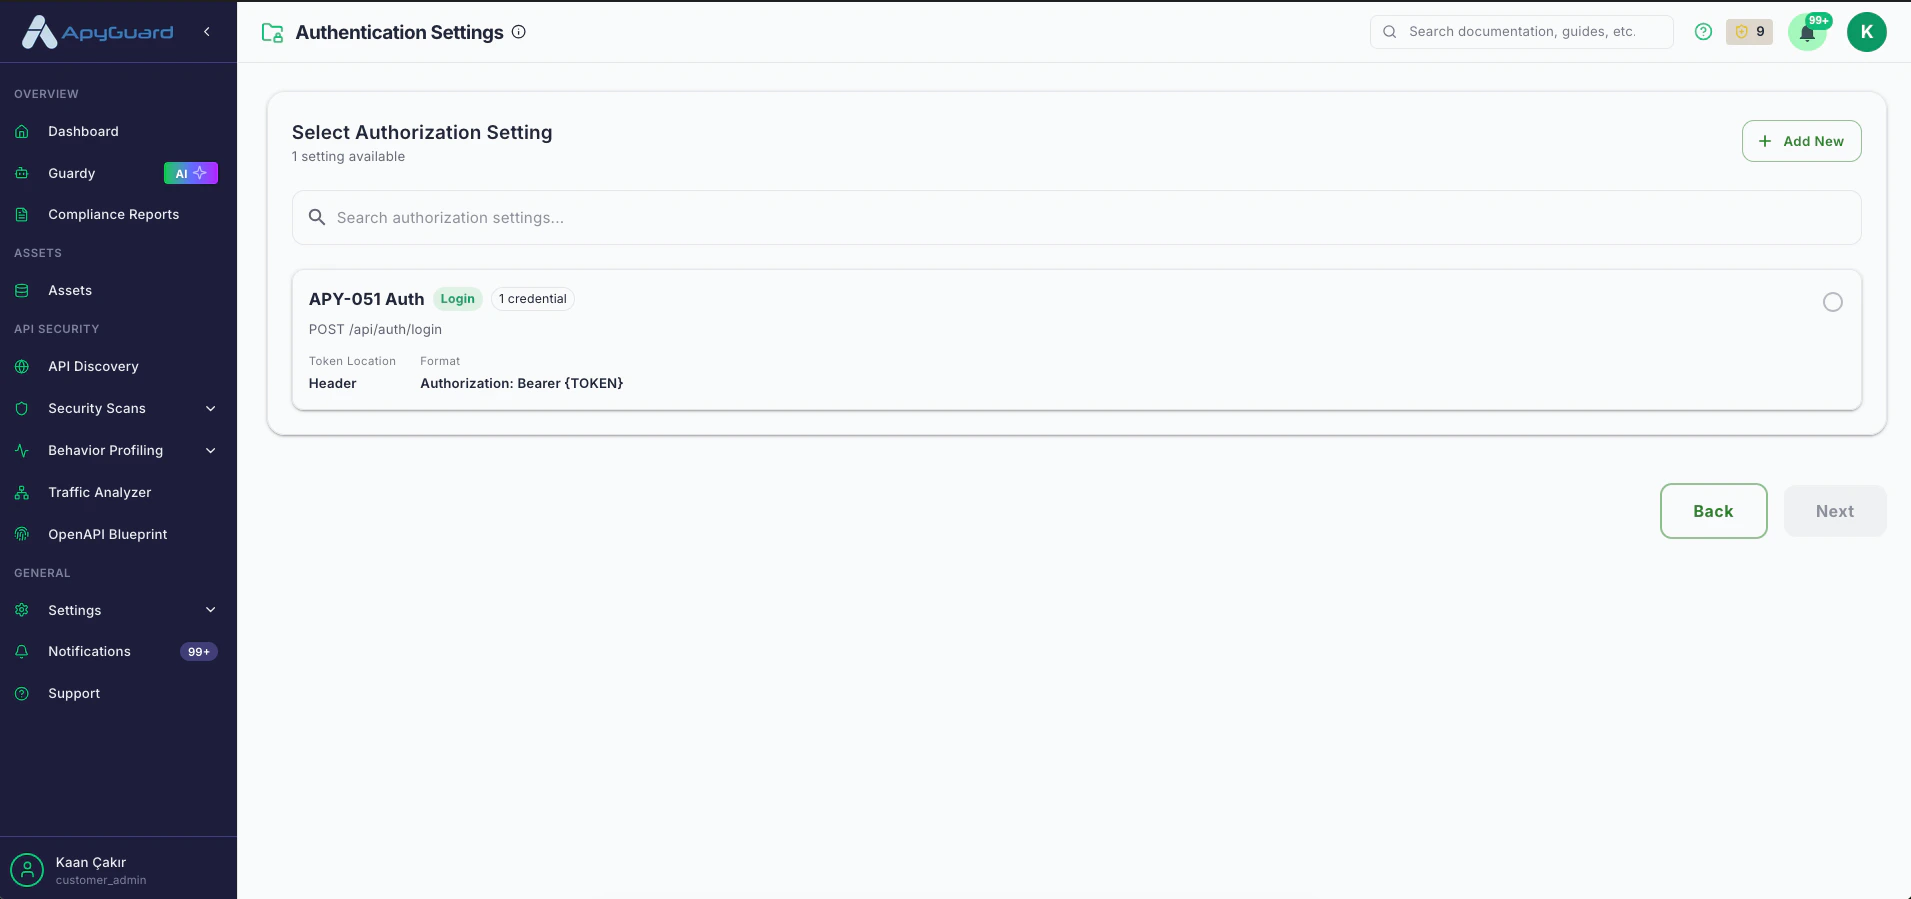 7. Select the endpoints to be used during the scan.
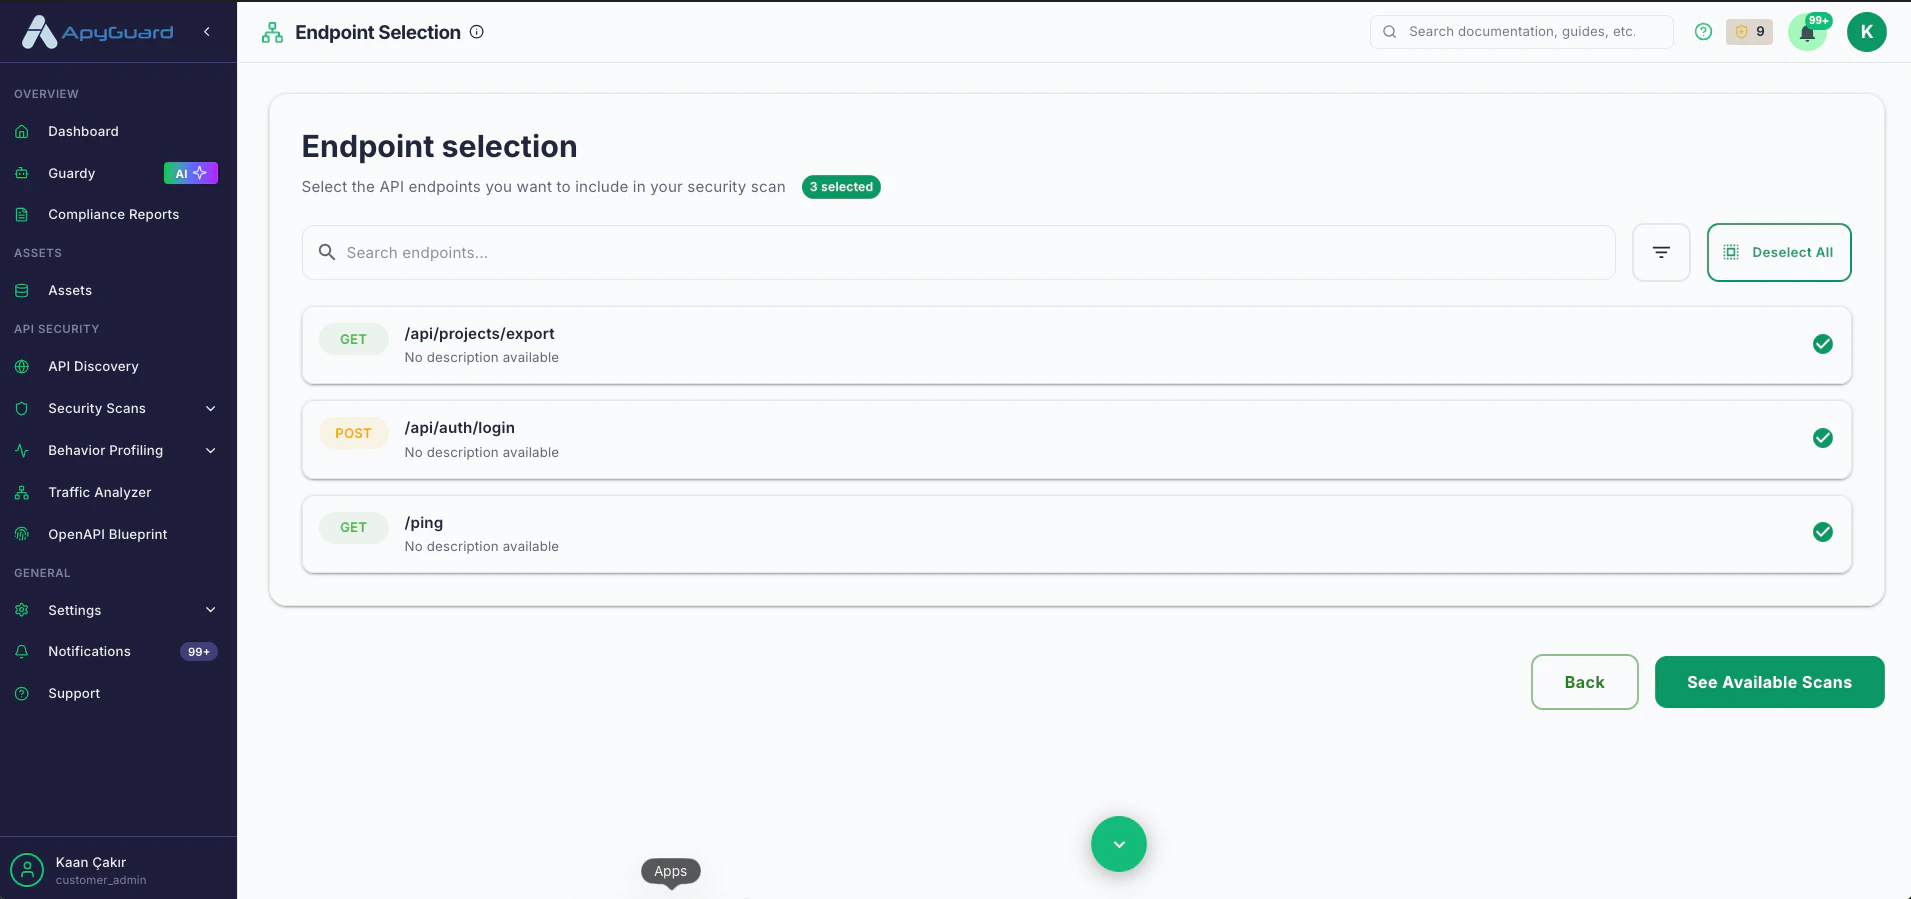 8. Select the scan types to be used for this scan.
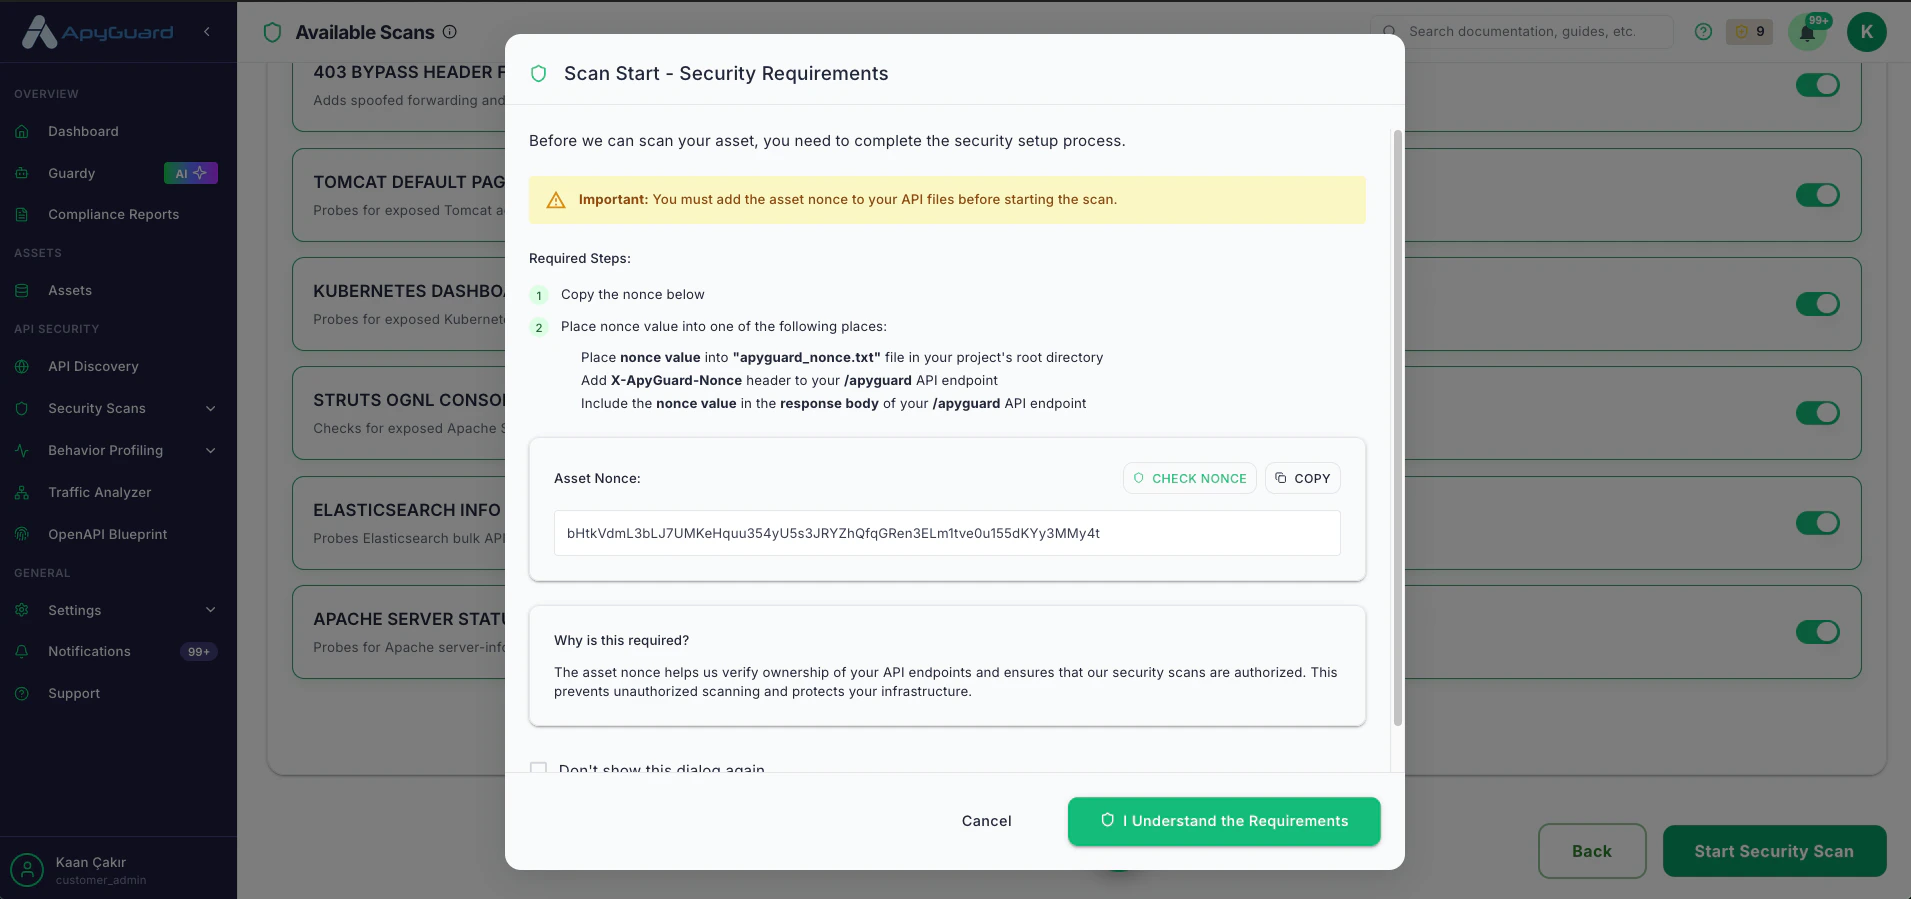
 9. Accept nonce verification and start scan.
 ## Step 4: Monitor Scan Progress
* View real-time scan progress in the dashboard
* Monitor endpoint testing status
* Check for any authentication issues
* Review preliminary findings
## Step 5: Review Results
Once the scan completes:
1. **Overview Dashboard**: See high-level security metrics
2. **Vulnerability Details**: Review each finding with:
* Risk level (Low/Medium/High/Critical)
* Description and impact
* Affected endpoints
* Remediation steps
3. **Risk Score**: Understand your overall API security posture
4. **Export Report**: Generate PDF or JSON reports
## Common First-Time Issues
### Authentication Errors
* **Problem**: Scan fails due to authentication issues
* **Solution**: Verify your API keys/tokens are valid and have proper permissions
### Rate Limiting
* **Problem**: API returns 429 errors during scan
* **Solution**: Adjust scan rate limits in settings or contact API provider
### Missing Endpoints
* **Problem**: Some endpoints not being tested
* **Solution**: Verify your API specification includes all endpoints
## Next Steps
After your first scan:
1. **Review High-Risk Vulnerabilities**: Focus on Critical and High-risk findings first
2. **Set Up Automated Scans**: Configure recurring scans for continuous monitoring
3. **Integrate with CI/CD**: Add security testing to your deployment pipeline
4. **Invite Team Members**: Collaborate with your development team
## Need Help?
* Review the [Quick Start guide](/get-started/quick-start) for the full onboarding path
* Visit [Authorization Settings](/core-workflows/authorization-settings) when a scan needs protected access
* Contact support through the in-app chat
***
**Related Guides:**
* [Authentication Overview](/authentication/overview)
* [Authorization Settings](/core-workflows/authorization-settings)
* [API Collections](/core-workflows/api-collections)
## Step 4: Monitor Scan Progress
* View real-time scan progress in the dashboard
* Monitor endpoint testing status
* Check for any authentication issues
* Review preliminary findings
## Step 5: Review Results
Once the scan completes:
1. **Overview Dashboard**: See high-level security metrics
2. **Vulnerability Details**: Review each finding with:
* Risk level (Low/Medium/High/Critical)
* Description and impact
* Affected endpoints
* Remediation steps
3. **Risk Score**: Understand your overall API security posture
4. **Export Report**: Generate PDF or JSON reports
## Common First-Time Issues
### Authentication Errors
* **Problem**: Scan fails due to authentication issues
* **Solution**: Verify your API keys/tokens are valid and have proper permissions
### Rate Limiting
* **Problem**: API returns 429 errors during scan
* **Solution**: Adjust scan rate limits in settings or contact API provider
### Missing Endpoints
* **Problem**: Some endpoints not being tested
* **Solution**: Verify your API specification includes all endpoints
## Next Steps
After your first scan:
1. **Review High-Risk Vulnerabilities**: Focus on Critical and High-risk findings first
2. **Set Up Automated Scans**: Configure recurring scans for continuous monitoring
3. **Integrate with CI/CD**: Add security testing to your deployment pipeline
4. **Invite Team Members**: Collaborate with your development team
## Need Help?
* Review the [Quick Start guide](/get-started/quick-start) for the full onboarding path
* Visit [Authorization Settings](/core-workflows/authorization-settings) when a scan needs protected access
* Contact support through the in-app chat
***
**Related Guides:**
* [Authentication Overview](/authentication/overview)
* [Authorization Settings](/core-workflows/authorization-settings)
* [API Collections](/core-workflows/api-collections)